Fort Reports Help
Welcome to Fort Reports
An elegantly powerful inspection tool for you iPad. While you inspect, a professional report is created, ready to email to clients from wherever you are.
There are 3 main sections in the app: SETUP, REPORT & PREVIEW. Most of the inspection is done in the Report area, but first, start in Set-up.
Training Videos
Watch a 5 minute video tutorial on a specific task you would like to learn.


Set-Up
Here you can create a new Report and setup your User Profile.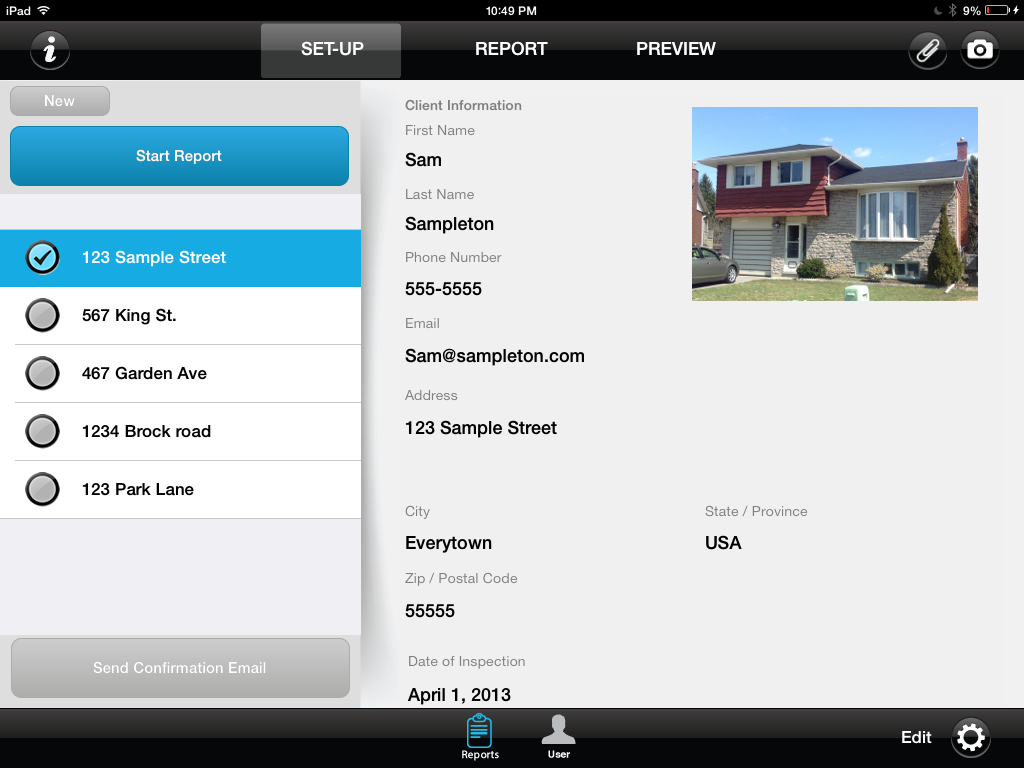
Setup > Reports
This is where you create new reports, enter address details and manage exiting reports.
Start a New Report
To start a new report click the New button at the top right and enter the address information. You can setup multiple reports ahead of time.
Setup > User
Enter your company information (which will be added to reports). Add your legal and terms and coditions here.Logo Click on the camera Icon to take a photo of the house. This will be used as your main house photo on the first page of the report. You can also click the paperclip icon to use a previously saved image. Standards of Inspection Enter your Standards of Inspection here. This will appear at the front of the report, below the house photo and address. If you have a lot of text, login to your account at www.fortreports.com and add your text there. Legal, Terms and Conditons Enter your Terms and Conditions here. These will be inserted at the bottom of the report above the signatures. If you have a lot of text, login to your account at www.fortreports.com and add your text there. Tips:
- Logo added by choosing an icon from your photo Library.
Get your icon onto your iPad using iCloud or Dropbox. Place it, when in your “User” section.
Report
The Report page is where you will do the majority of your work.
There are 8 primary sections:- Roofing
- Exterior
- Interior
- Structure
- Electrical
- Plumbing
- Heating
- Cooling
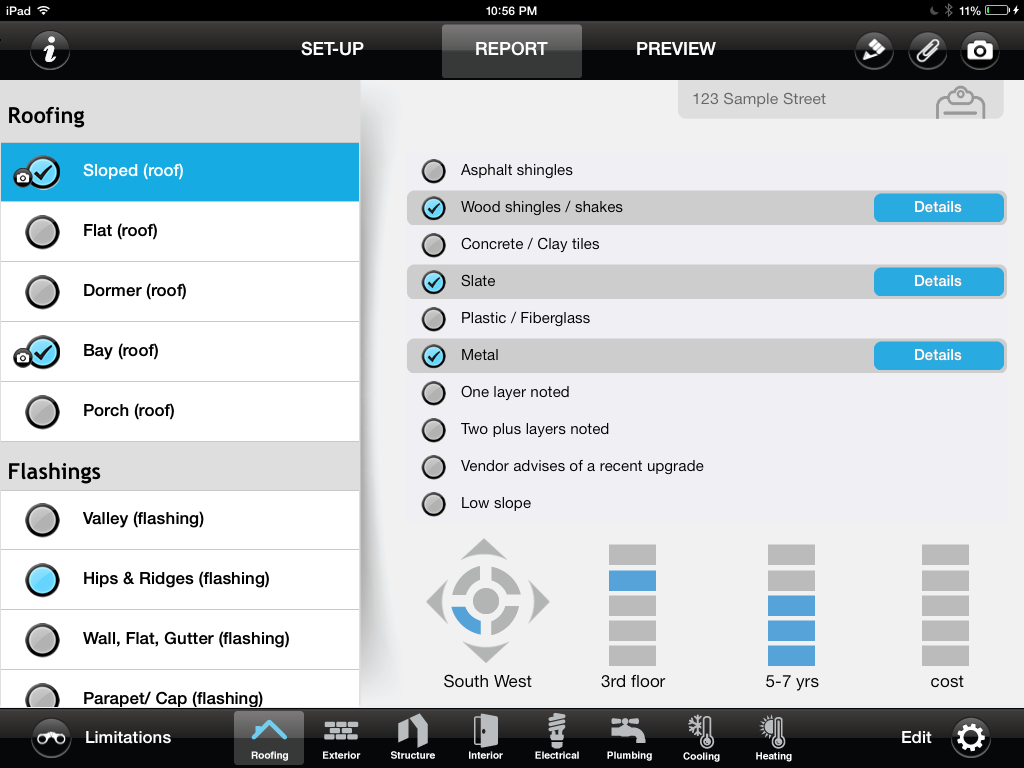
Categories scroll on the Left side.
(example = You choose the “Porch Roof”)
(example = You choose the “Asphalt” for the “Porch Roof”)
Details button at the end of your “Asphalt” choice, Expands your observations by choosing a comment.
(example = You choose the “Nearing the end of its natural life expectancy” for the “Asphalt” on the “Porch Roof”)
Control Panel located on the lower Right. This contains information on Direction, Level (Floor), Years & Cost.
Tips:- Edit any of the existing comments in either Descriptions OR Details by clicking the Edit button (gear icon) at the bottom right. What you change, stays for all of your future reports.
- Use the pencil icon to add additional notes to a category
- Add more of the same Category by clicking the edit button (gear icon) and then clicking the green plus beside a category. This will add a second instance of that item.
Fact Sheet
Below are the items on the Fact Sheet of the report (2nd page) and where to find them in the Report section of the app.
|
Section |
Sub-section |
Category |
|
Roofing |
|
|
|
Material Type |
Roofing |
Sloped (roof) |
|
Age Remaining |
Roofing |
Sloped (roof) / Flat (roof) |
|
Chimney |
Chimney |
Chimney |
|
|
|
|
|
Exterior |
|
|
|
Wall |
Walls |
Main (walls) |
|
Grading |
Grounds |
Lot Grading |
|
Porch & Deck |
porch, deck & patio |
porch & deck |
|
|
|
|
|
Interior |
|
|
|
Attic Insulation Type |
Insulation |
Attic Insulation |
|
R-Value |
Insulation |
Attic Insulation |
|
Windows |
Windows |
windows overview |
|
|
|
|
|
Electrical |
|
|
|
Amperes |
Service Entrance |
Main Disconnect (amps) |
|
Breakers or Fuses |
Distribution Panel |
Distribution Panel |
|
Wiring Distribution |
Distribution |
Branch Wiring |
|
|
|
|
|
Structure |
|
|
|
Foundation |
Foundations |
Foundation Overview |
|
Wall Type |
Walls |
Wall - Overview |
|
Basement |
Foundations |
Basement / Crawl space |
|
|
|
|
|
Plumbing |
|
|
|
Supply Pipe |
Supply Piping |
Water source (supply) |
|
Waste Pipe |
Waste |
Waste Piping |
|
Hot Water |
Water Heater |
Water Heater Tank |
|
|
|
|
|
Heating |
|
|
|
System |
Heating Plant |
System type / specs |
|
Age |
Heating Plant |
System type / specs |
|
Fuel |
Heating Plant |
Fuel, delivery lines |
|
|
|
|
|
Cooling |
|
|
|
System |
Cooling/heat pump |
system type specs |
|
Age |
Cooling/heat pump |
system type specs |
|
Size |
Cooling/heat pump |
system type specs |
Preview
This is where you upload your data to the server, then, send your Report.
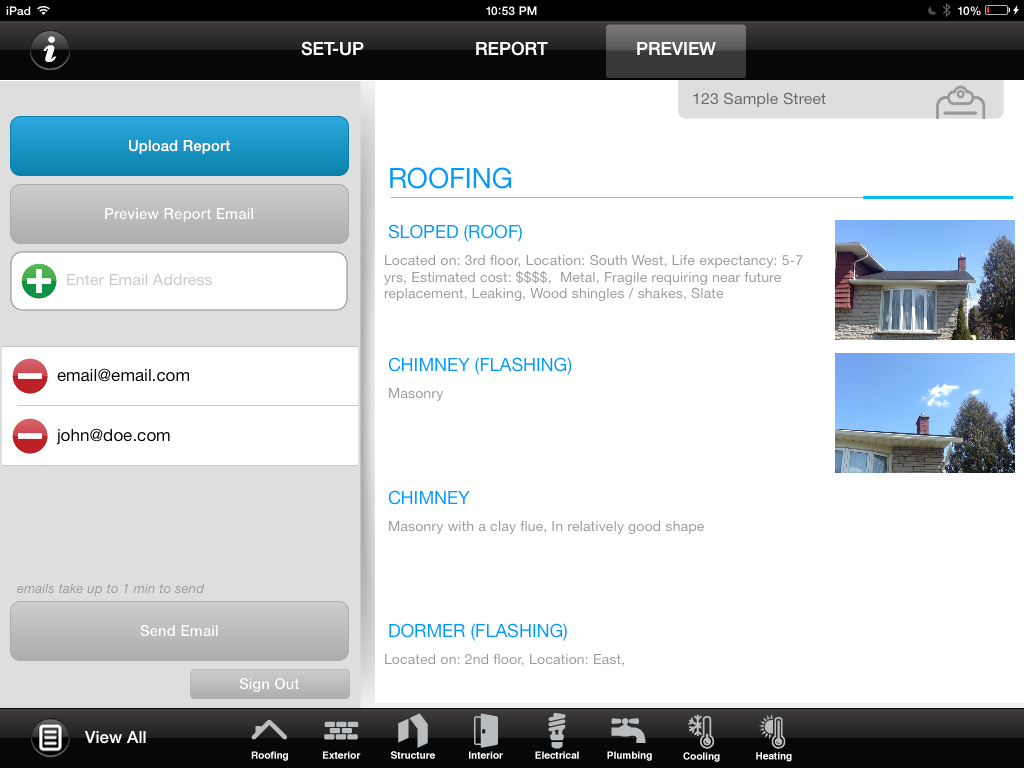
Upload
Click to upload your report to the cloud. this must be done before you can view or email your report. Note: uploading can take up to 5 minutes depending on your connection speed and size of your report.
View
See your completed report in a web browser. Here you can see whats missing, then Edit.
Send
After entering the email addresses you would like to send your report to , click "Send Email" . The reports will be sent directly to your clients.
Buttons
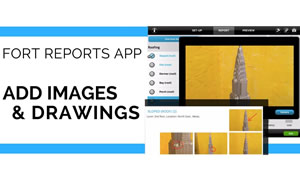
 Photo Library (Paperclip / @ upper Right)
Access & use your iPads photo Library. Transfer your Logo from here.
- - When “Rushed” or “Cold”, take multiple photo’s; Then add them to the report later.
 Camera (Camera / @ upper Right)
Photo’s stay in their field(s), when you use our Camera, on the Spot.
- Add “Multiple” photo’s simply by adding “Categories” (example = Lets say its a side split roof).
- Lower right button is the “Edit” button. Hit it. Green plus signs show up.
- First roof is say: North, 2nd level and in bad shape. (all that is detailed). ADD photo.
- Second roof is: South, 1st level but is in better shape. ADD photo
- Third roof is a porch: on the West, 1st level and is fine. ADD a photo. You can keep adding categories with direction and details, that have their own photo.
- This is also really handy when you have a huge house and multiple toilets, sinks, plugs, tubs; you name it ADD categories: Toilet (Basement), Toilet (2nd floor, East), Toilet (2nd floor, S.W.), etc, etc. All with their own photos. I find it works really well.
 Edit (CogWheel / @ lower Left)
Add “Reports” Address, Clients info, Direction, Weather etc. Don’t forget top press “Save” when finished.
Add “User” Company info, Logo, Terms & Conditions.
Add “Categories” by pressing the green “Plus” sign. Delete, pressing red “minus”. #2 will be added @ the bottom of that list.
Add “Descriptions” by pressing the green “Add New Item” (Top center).
Edit “Descriptions” AND “Details”. Not happy with pre-installed comments? No problem … simply change.
All personalized “Edits” will remain with your account.
 Help (Info icon / @ upper Left)
Helps unleash FortReports power.
 Notes (Pencil / @ upper Right)
Add personalized comments, to any section.
A “Highlight” button (bottom center in the Notes window); will Push that specific Note to the top of the report.
(example = you find “termites” so you wish to Highlight this very important point).
 Limitations (Binocular / @ lower Left)
Used in Report section only advising why you could not inspect. Limits liability.
Thanks :)
This is a new App,so please send us your comments. I'm a Home Inspector but I do realize we all have our own way of doing things so… let me know what you like and how you would like the App improved. We will try to accommodate you.By the way my name is Rick, if you still have problems, drop me a line at
E: hi@fortreports.com or
T: 1-800-837-0255
I am an actual Home inspector, so please be patient as I get back to you. Honestly …. I'm probably out doing an inspection. I will get back to you as quickly as possible. I look forward to getting your feedback.
Thanks and happy inspecting.
Tip’s - When “Rushed” or “Cold”, take multiple photo’s; Then add them to the report later.
Tip’s -
- Add “Multiple” photo’s simply by adding “Categories” (example = Lets say its a side split roof.)
- - Lower right button is the “Edit” button. Hit it. Green plus signs show up.
- - First roof is say: North, 2nd level and in bad shape. (all that is detailed). ADD photo.
- - Second roof is: South, 1st level but is in better shape. ADD photo
- - Third roof is a porch: on the West, 1st level and is fine. ADD a photo. You can keep adding categories with direction and details, that have their own photo.
This is also really handy when you have a huge house and multiple toilets, sinks, plugs, tubs; you name it
ADD categories: Toilet (Basement), Toilet (2nd floor, East), Toilet (2nd floor, S.W.), etc, etc. All with their own photos. I find it works really well.
The other ones you can figure out: fuel for heating, Slope, Deck, foundation type etc.